Before you begin: Before creating your first criterion, you should identify an issue with
your model’s output that you want to detect and correct. You should also have either an OpenPipe
dataset or a JSONL
file containing several rows of
data that exhibit the issue, and several that don’t.
Creating a Criterion
1
Open the creation modal
Navigate to the Criteria tab and click the New Criterion button.
The creation modal will open with a default prompt and judge model.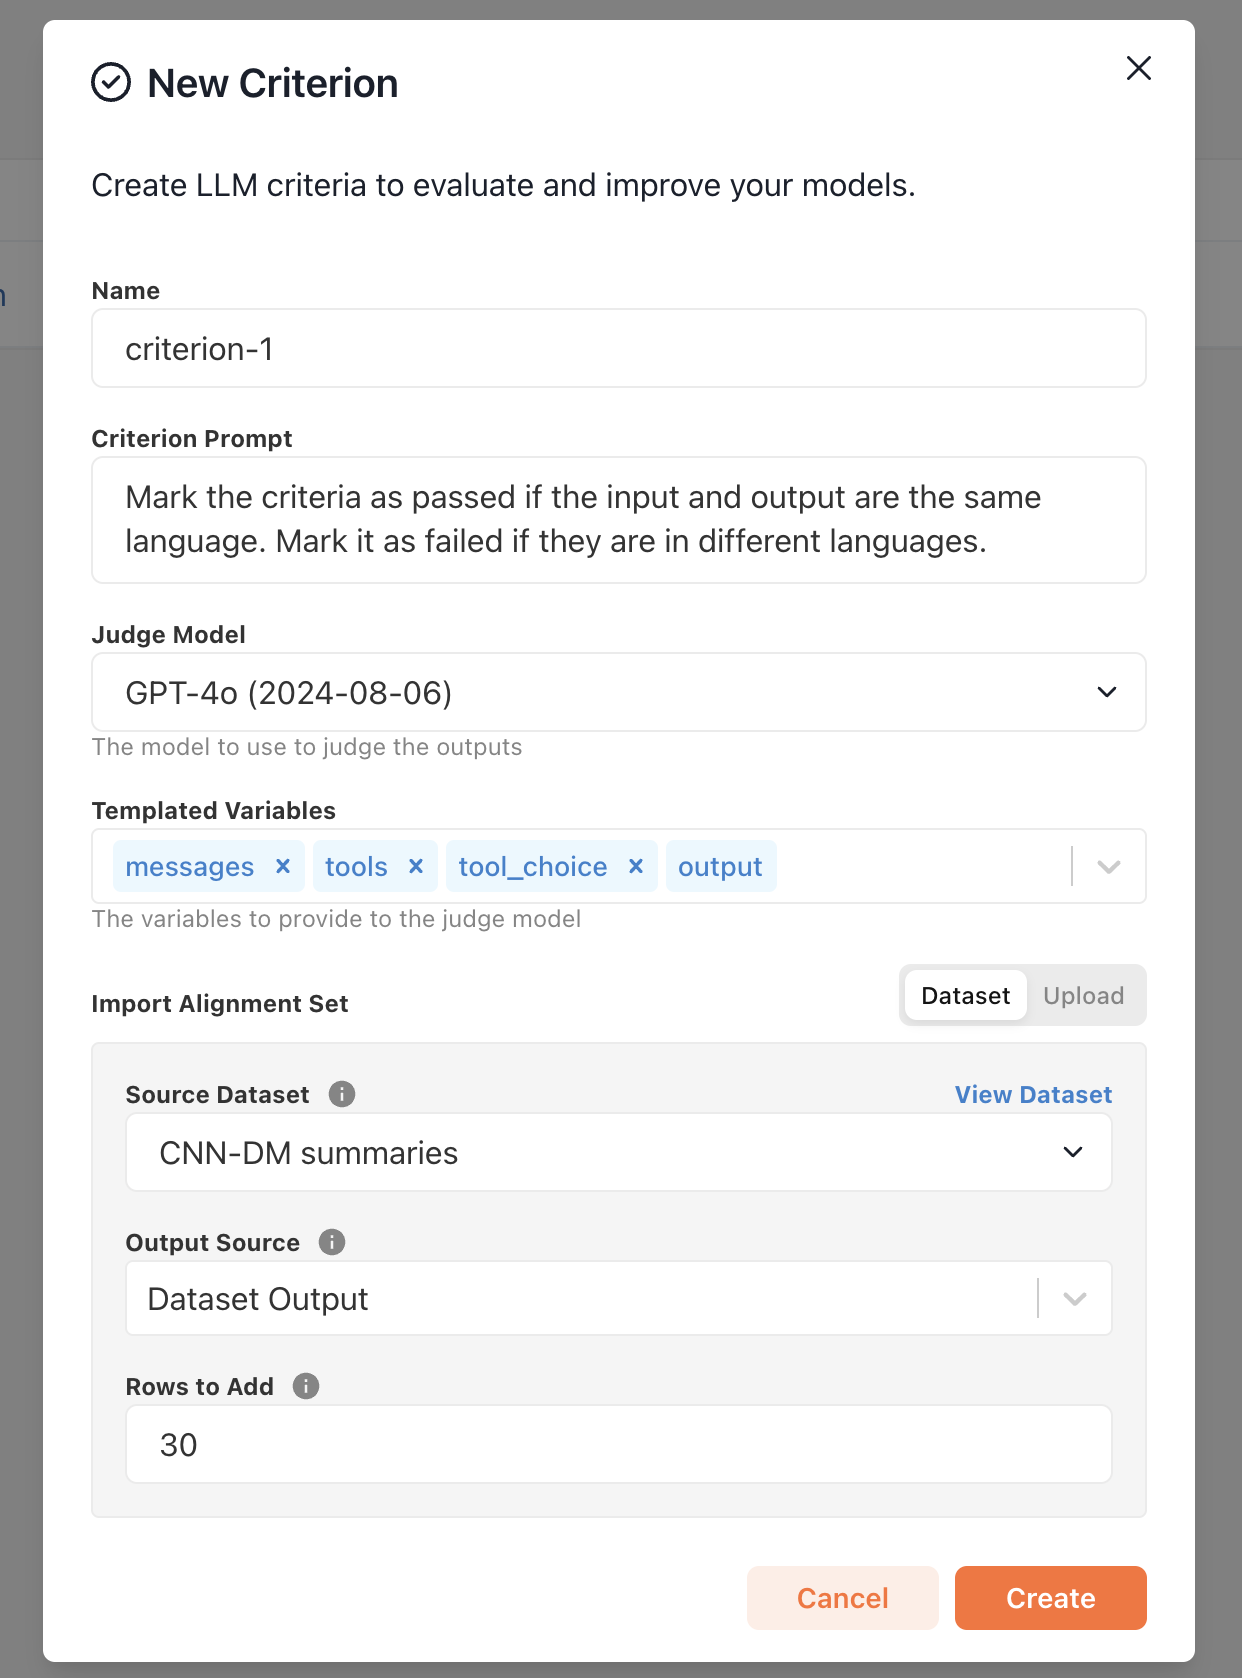
messages(optional): The messages used to generate the outputtools(optional): The tools used to generate the outputtool_choice(optional): The tool choice used to generate the outputoutput(required): The chat completion object to be judged
output. You can exclude fields by removing them from the Templated Variables section.2
Draft an initial prompt
Write an initial LLM prompt with basic instructions for identifying rows containing
the issue you want to detect and correct. Don’t worry about engineering a perfect
prompt, you’ll have a chance to improve it during the alignment process.As an example, if you want to detect rows in which the model’s output is in a different language than the input,
you might write a prompt like this:Finally, import a few rows (we recommend at least 30) into an alignment set for the criterion.
3
Confirm creation
Click Create to create the criterion and run the initial prompt against the imported alignment set.
You’ll be redirected to the criterion’s alignment page.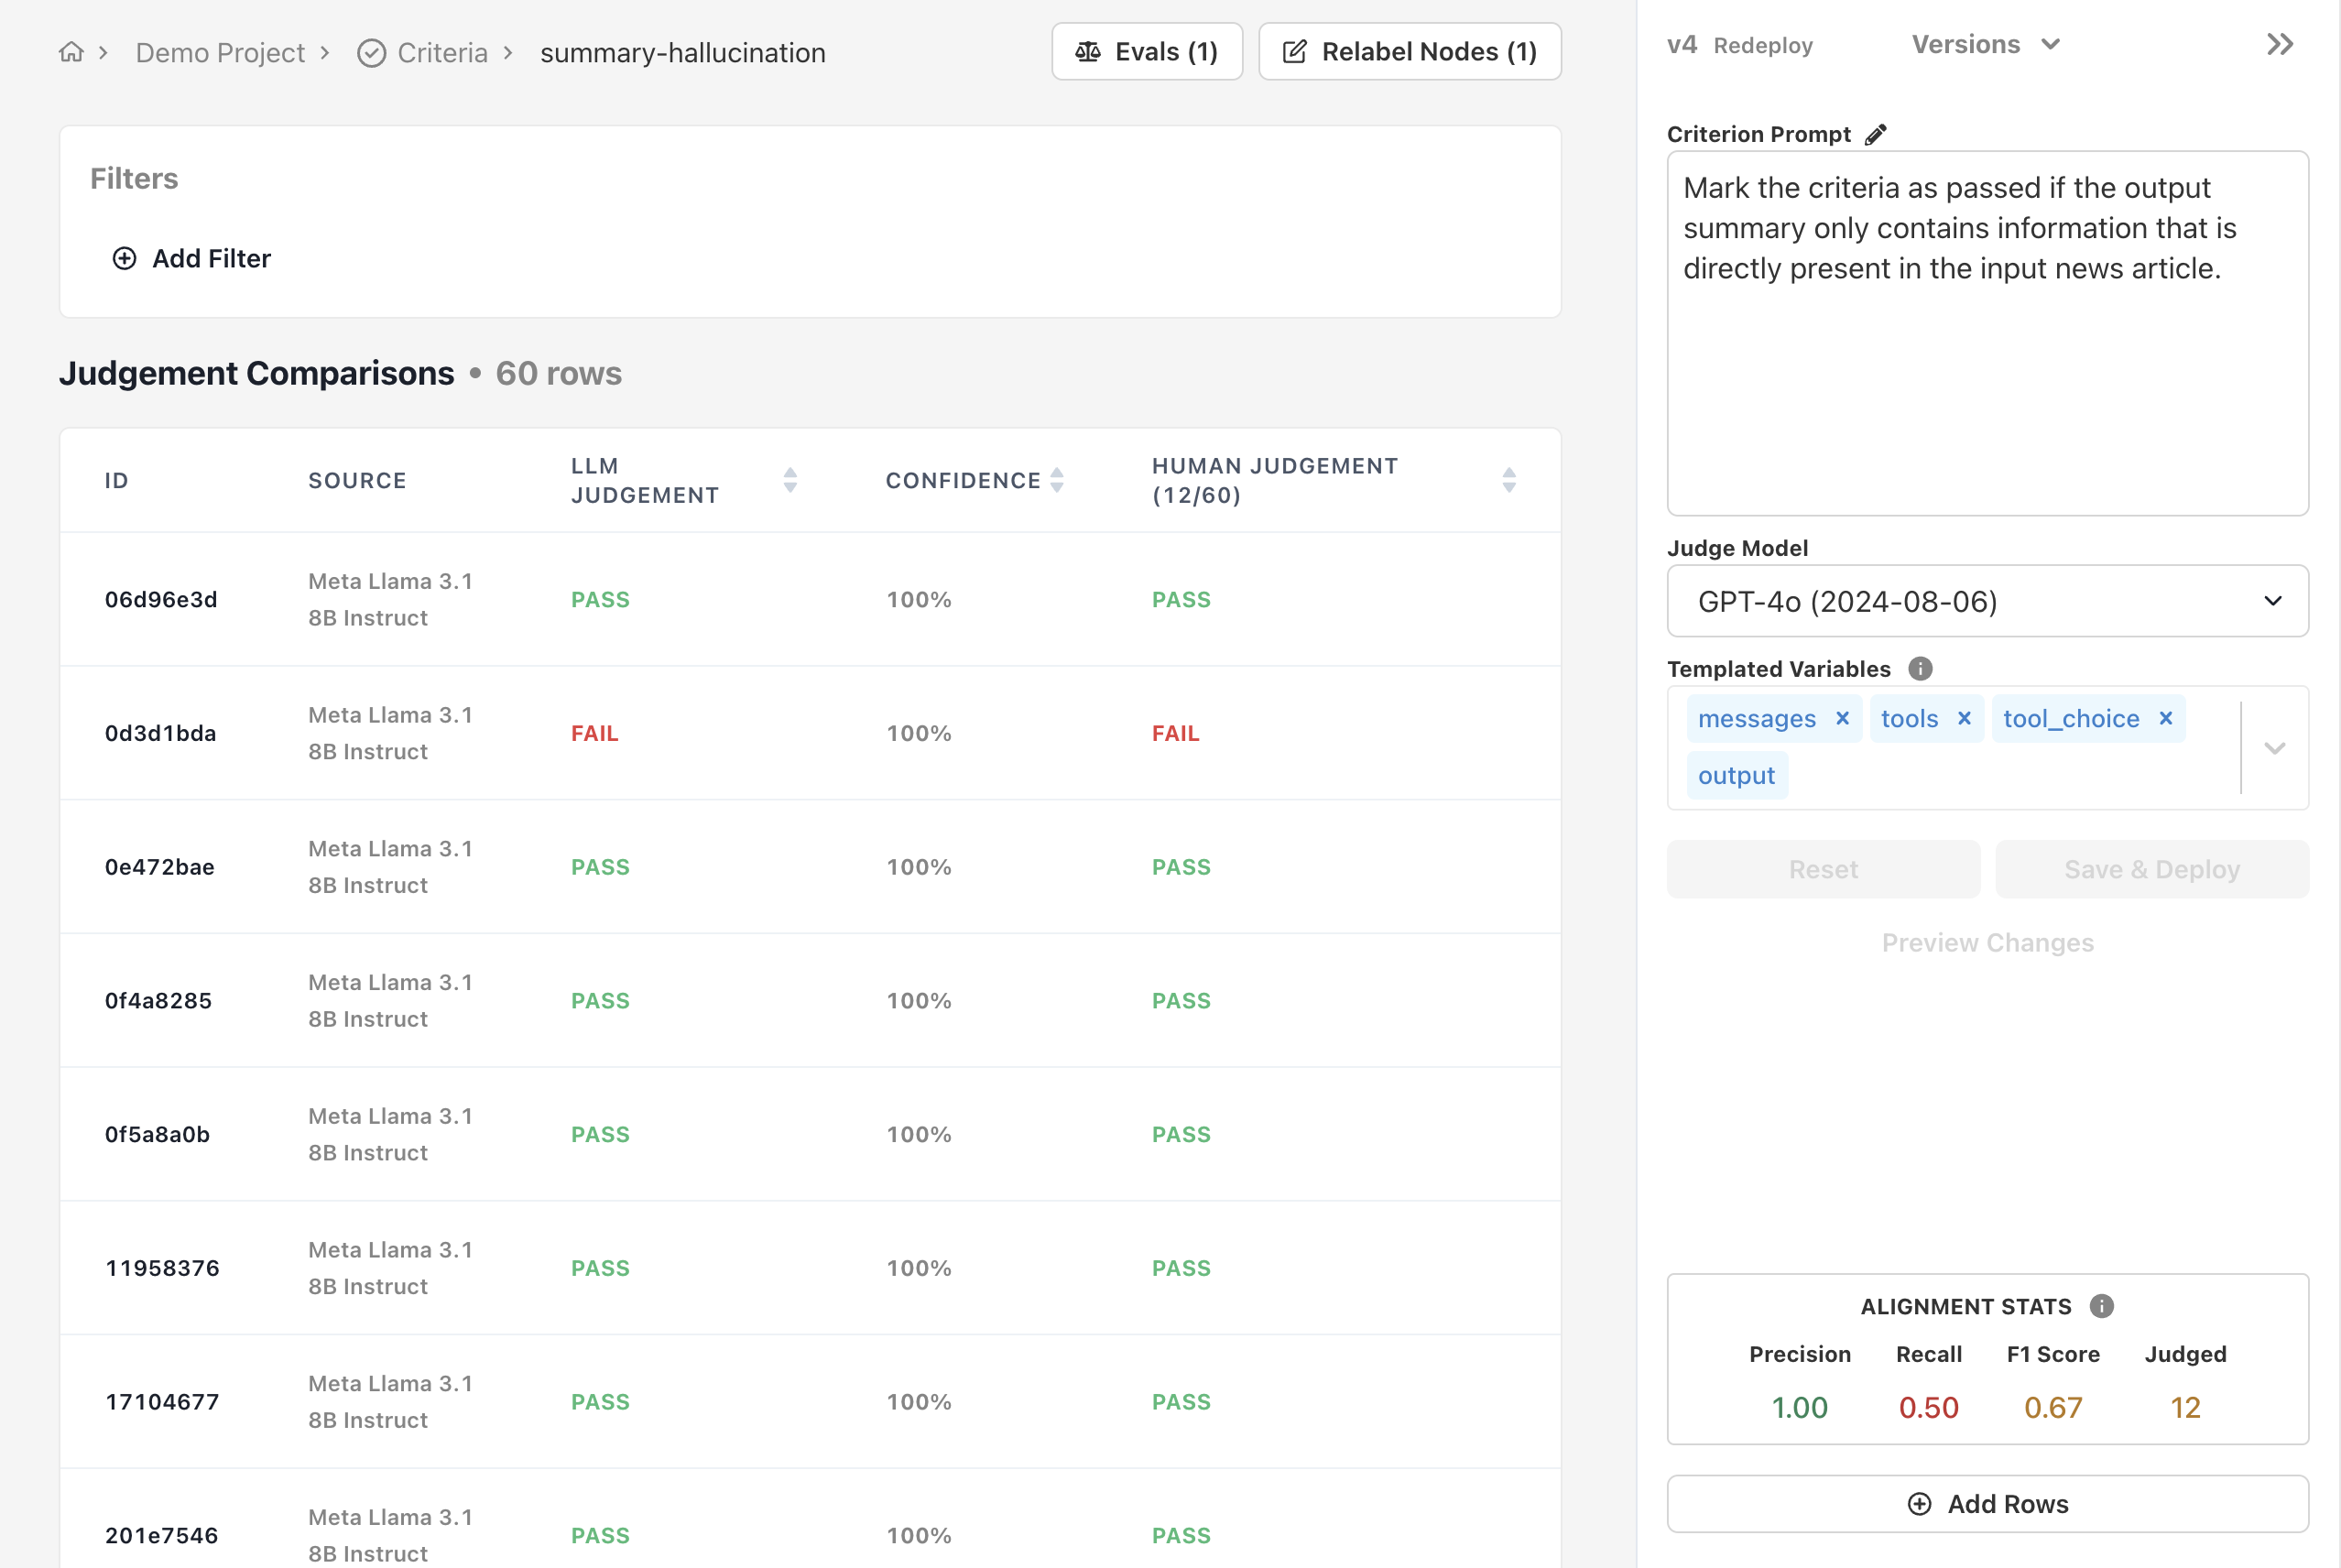
Aligning a Criterion
Ensuring your criterion’s judgements are reliable involves two simple processes:- Manually labeling outputs
- Refining the criterion
1
Manually labeling outputs
In order to know whether you agree with your criterion’s judgements, you’ll need to label some data yourself.
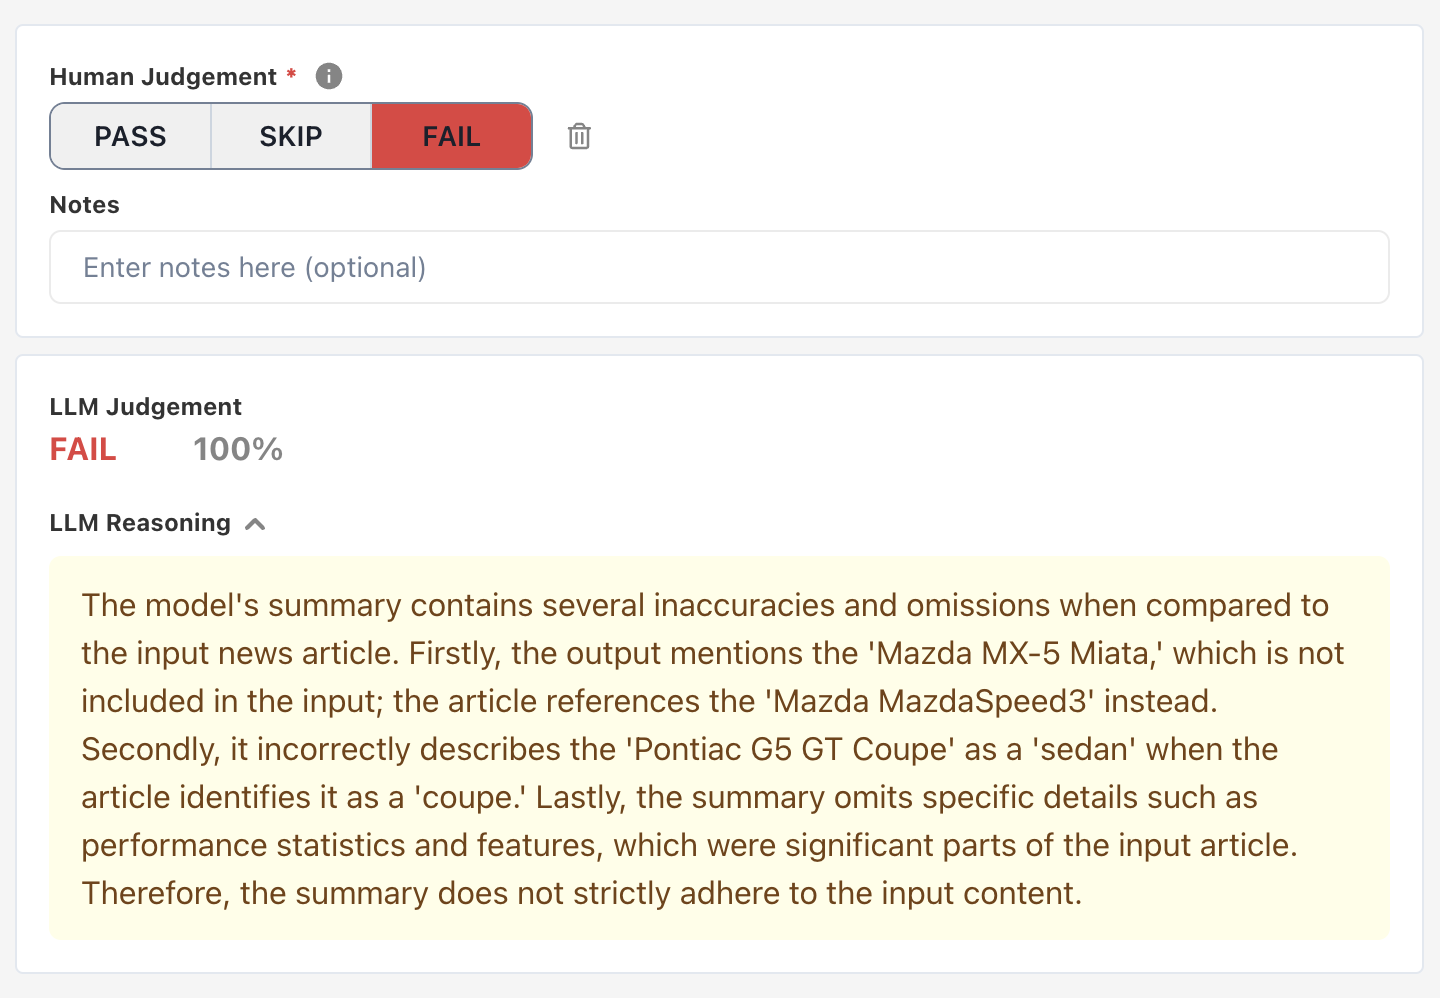
Use the Alignment UI to manually label each output with 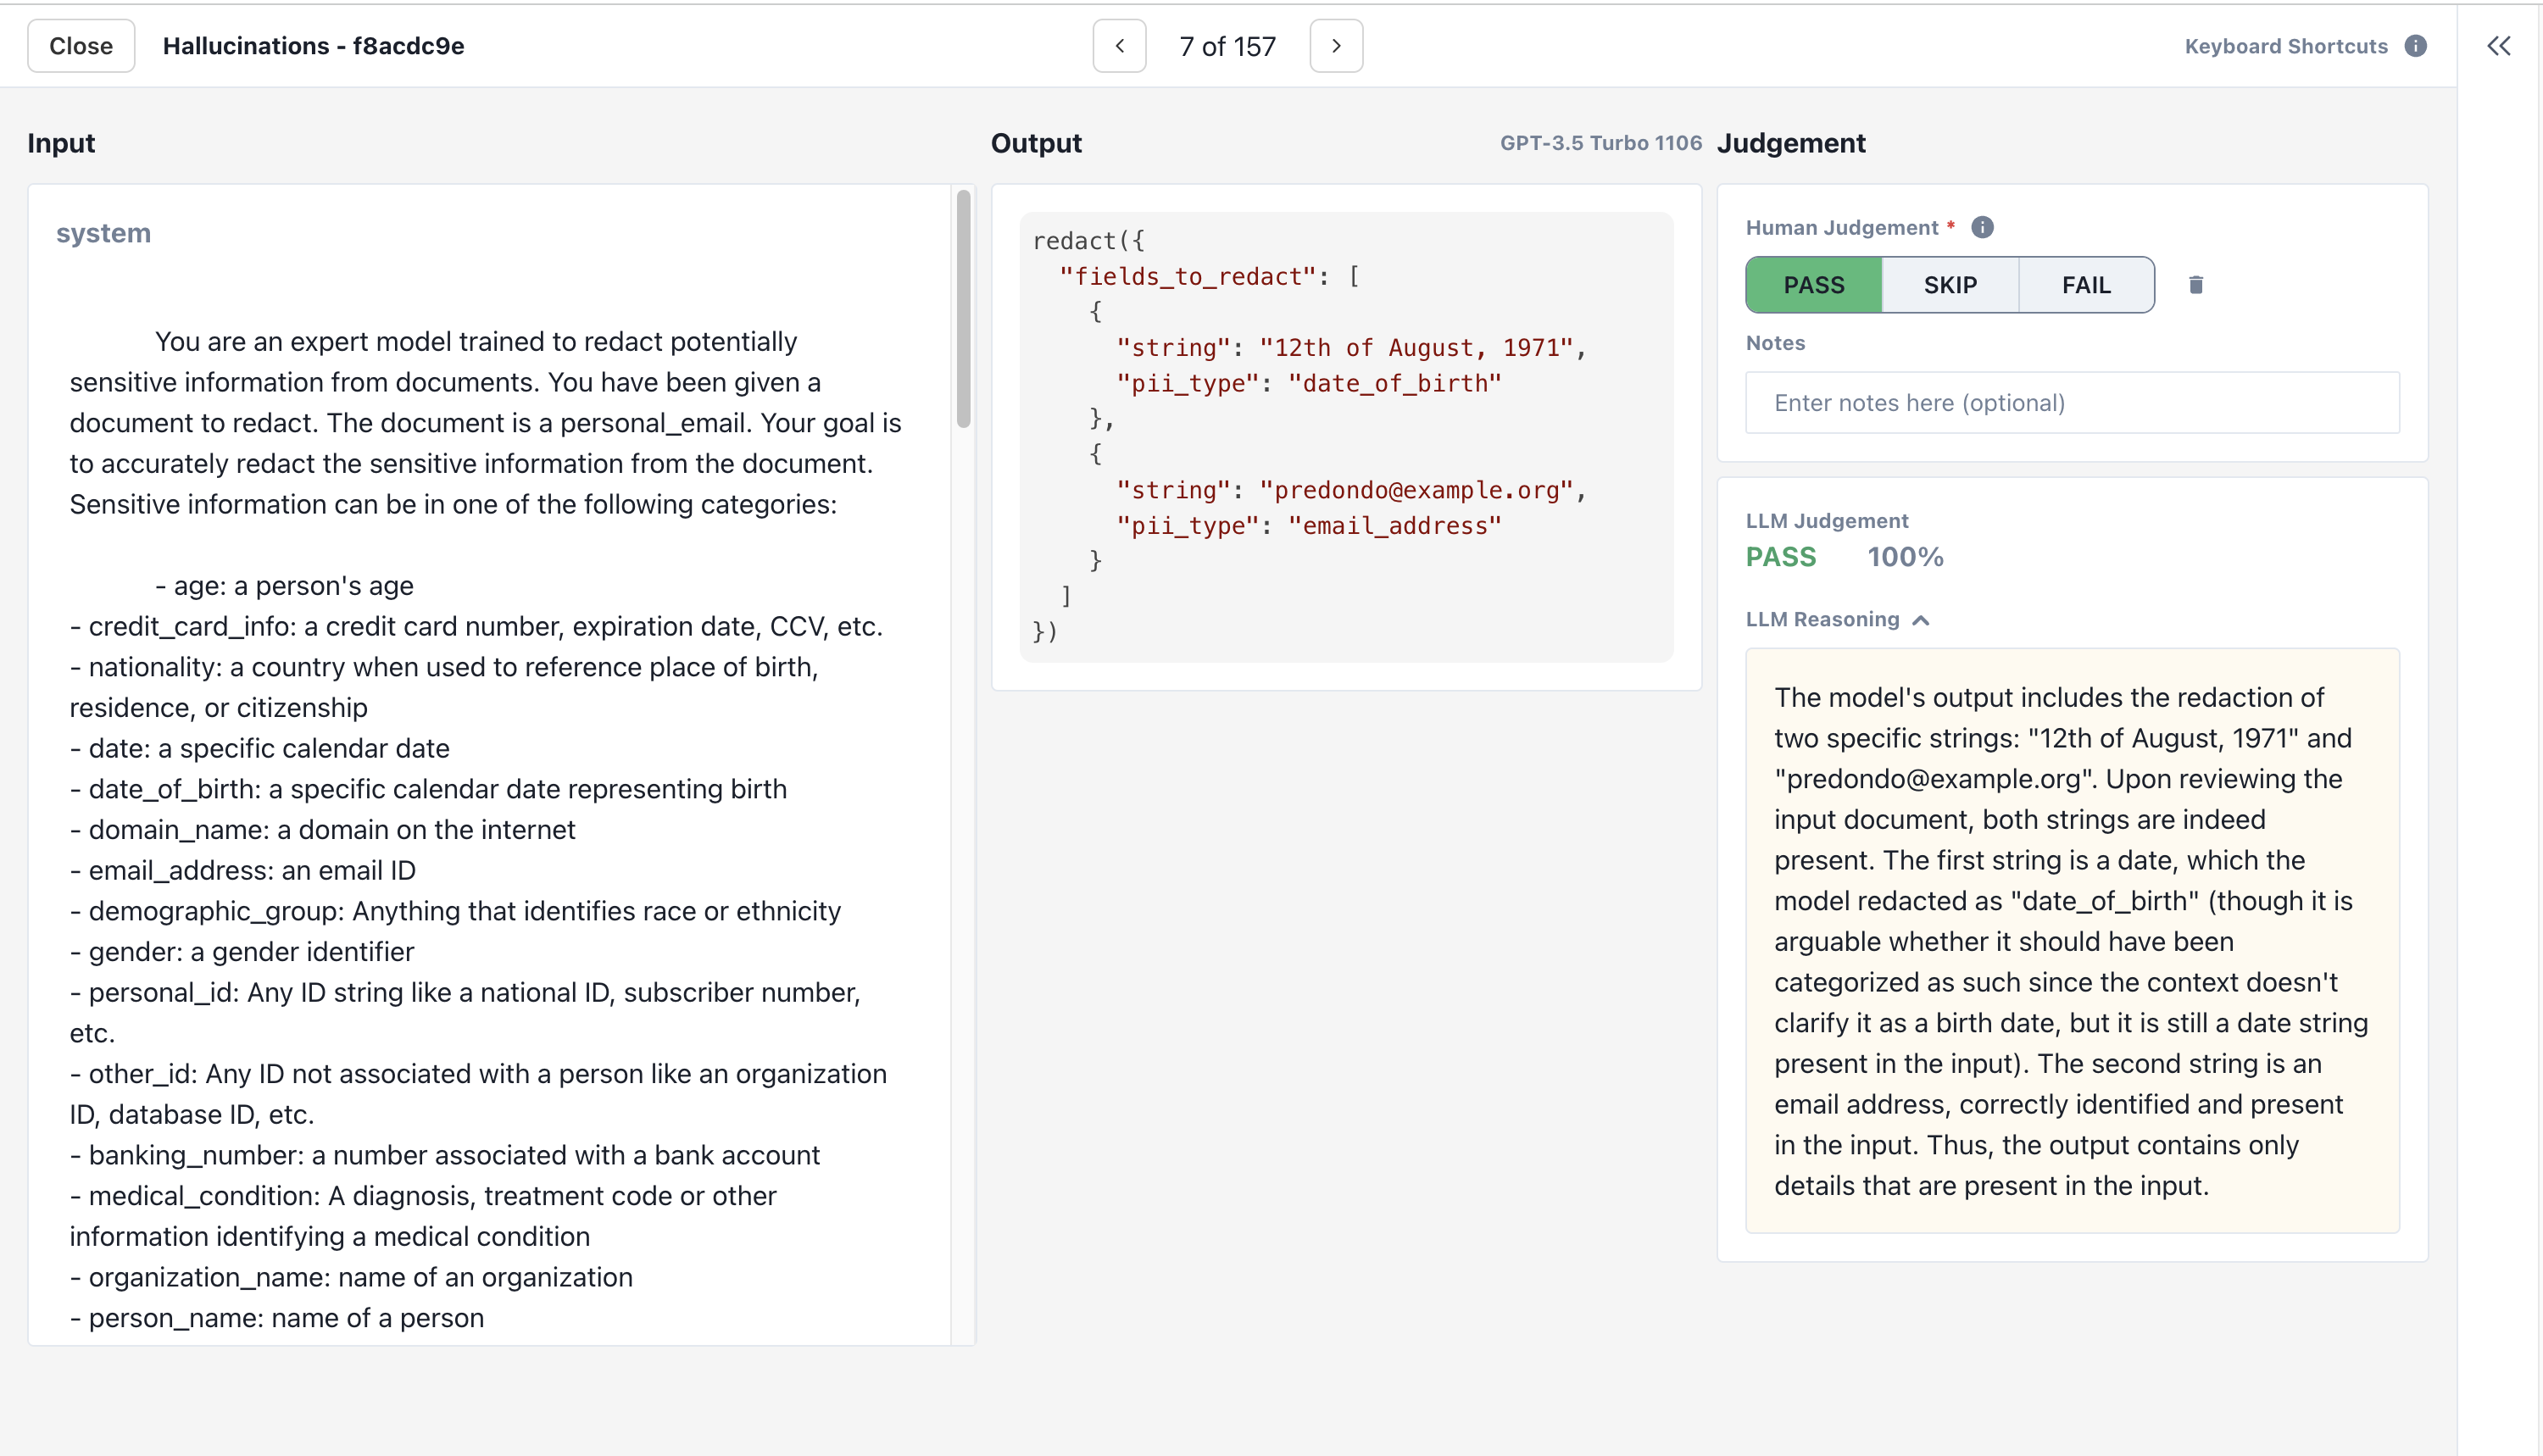
PASS or FAIL based on the criterion. Feel free to SKIP outputs you aren’t sure about and come back to them later.2
Refining the criterion
As you record your own judgements, alter the criterion’s prompt and judge model to align its judgements with your own.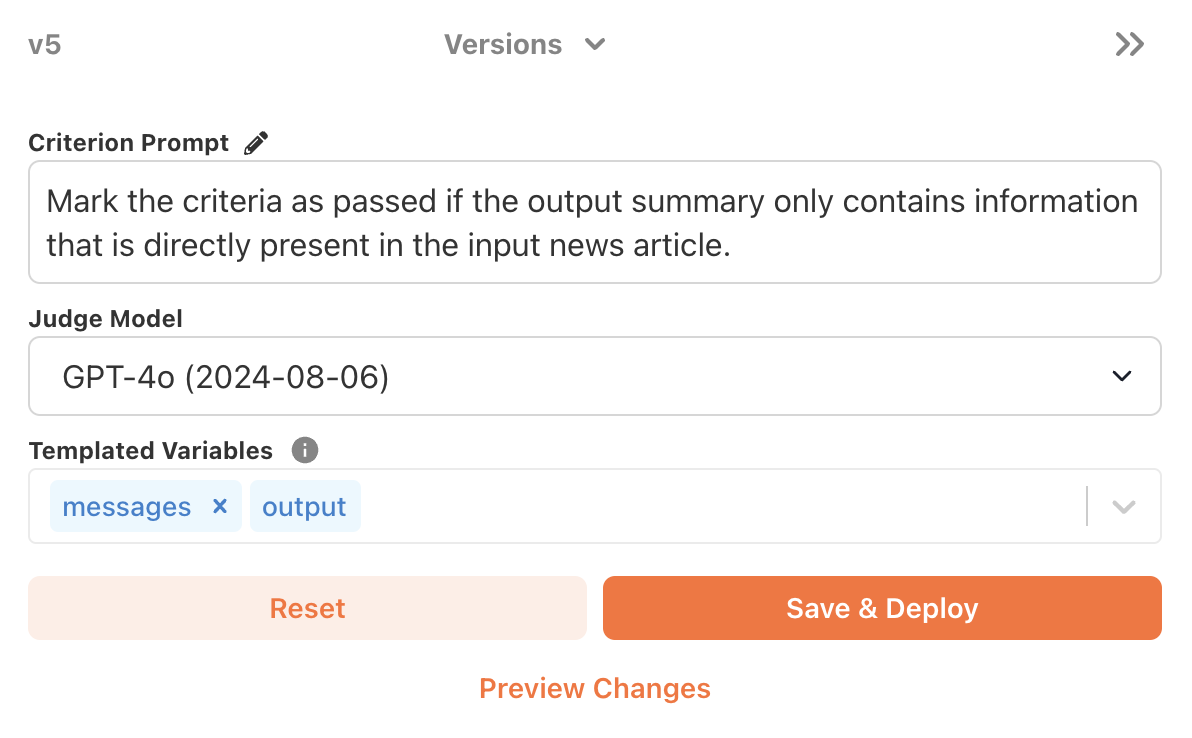
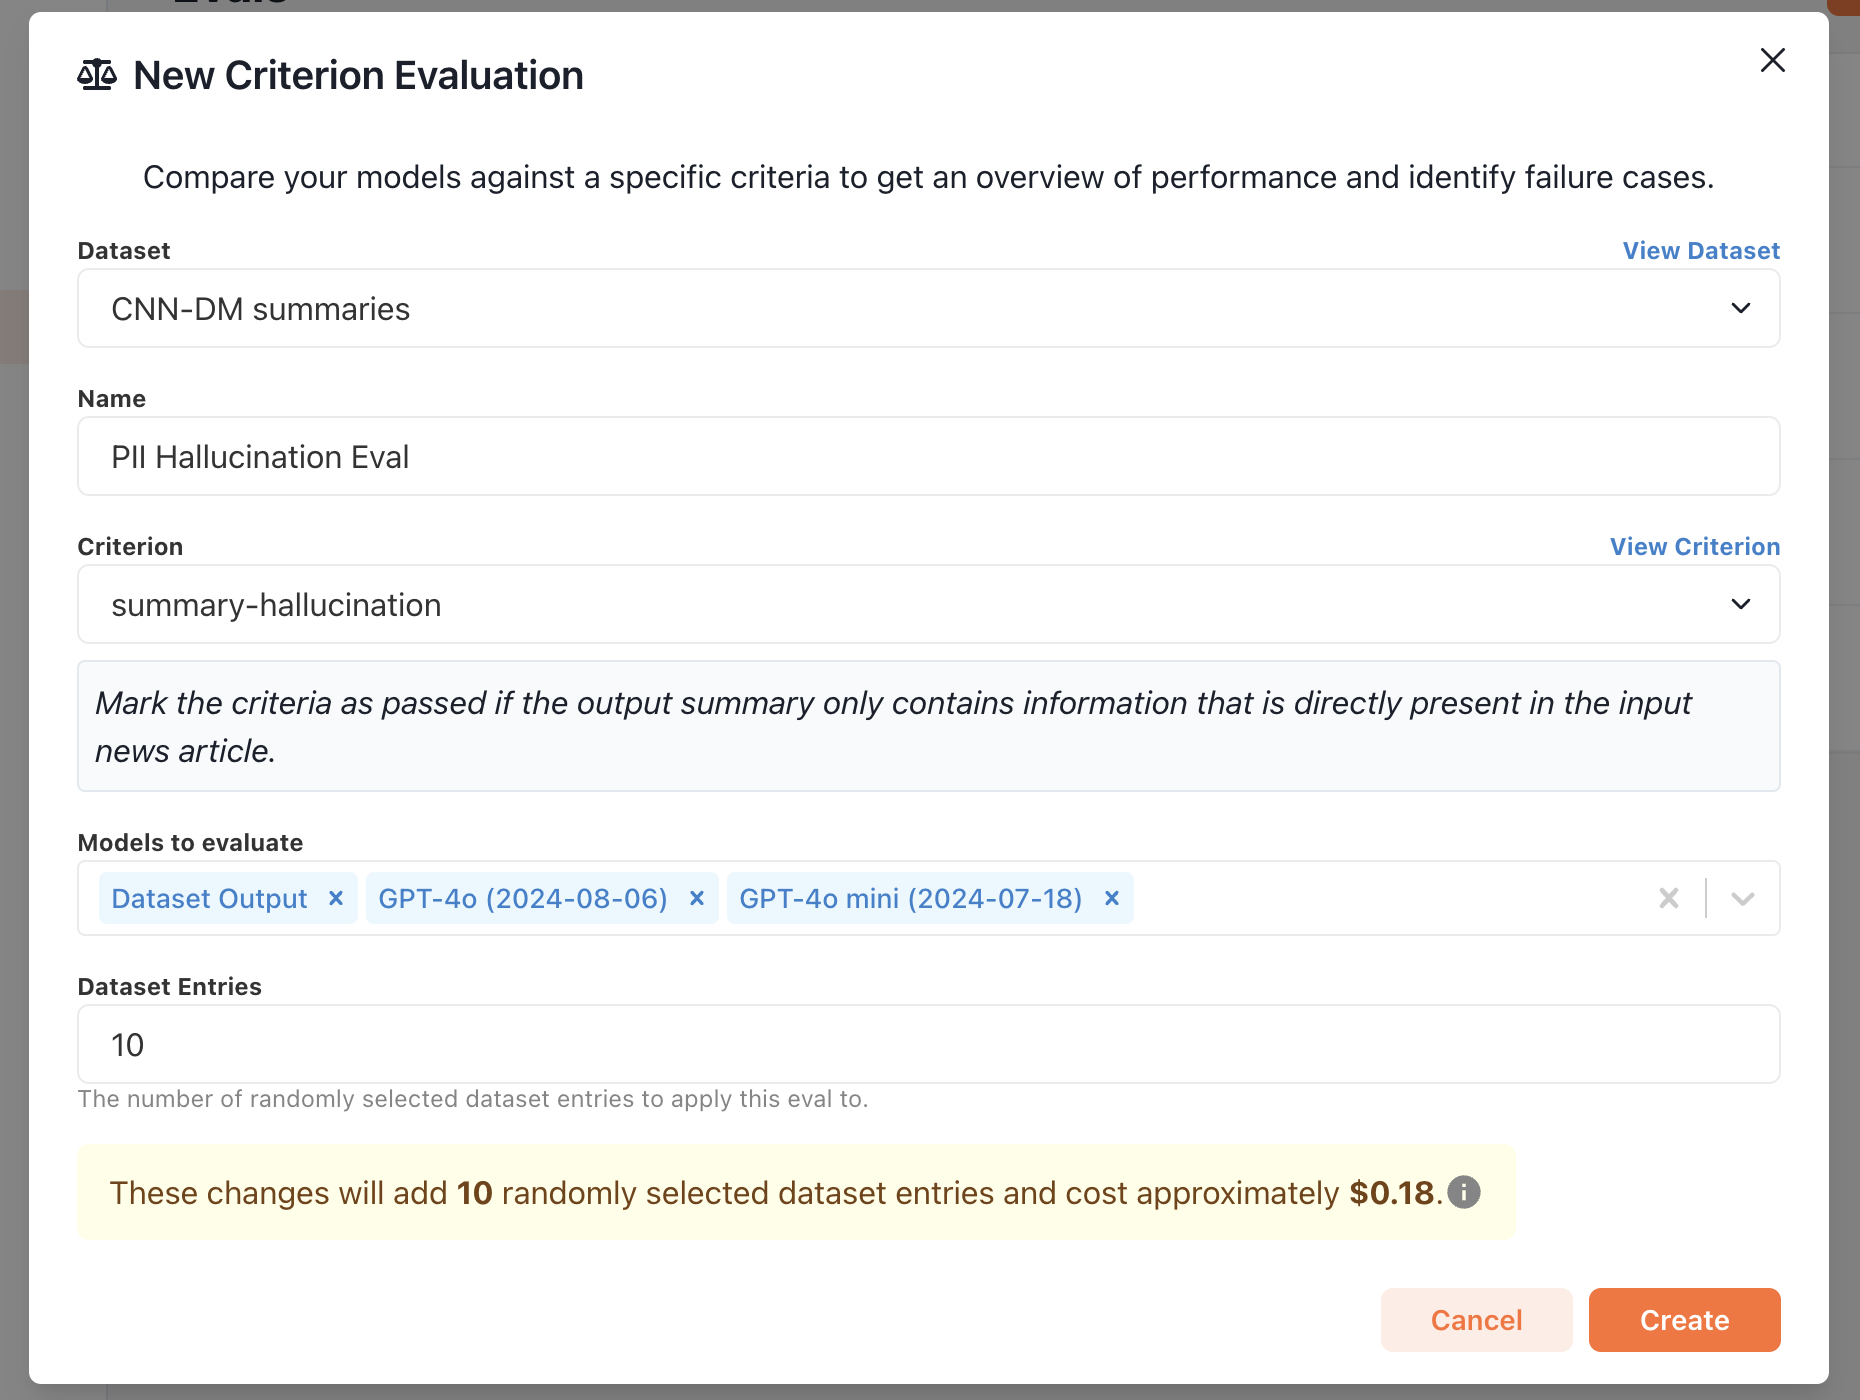
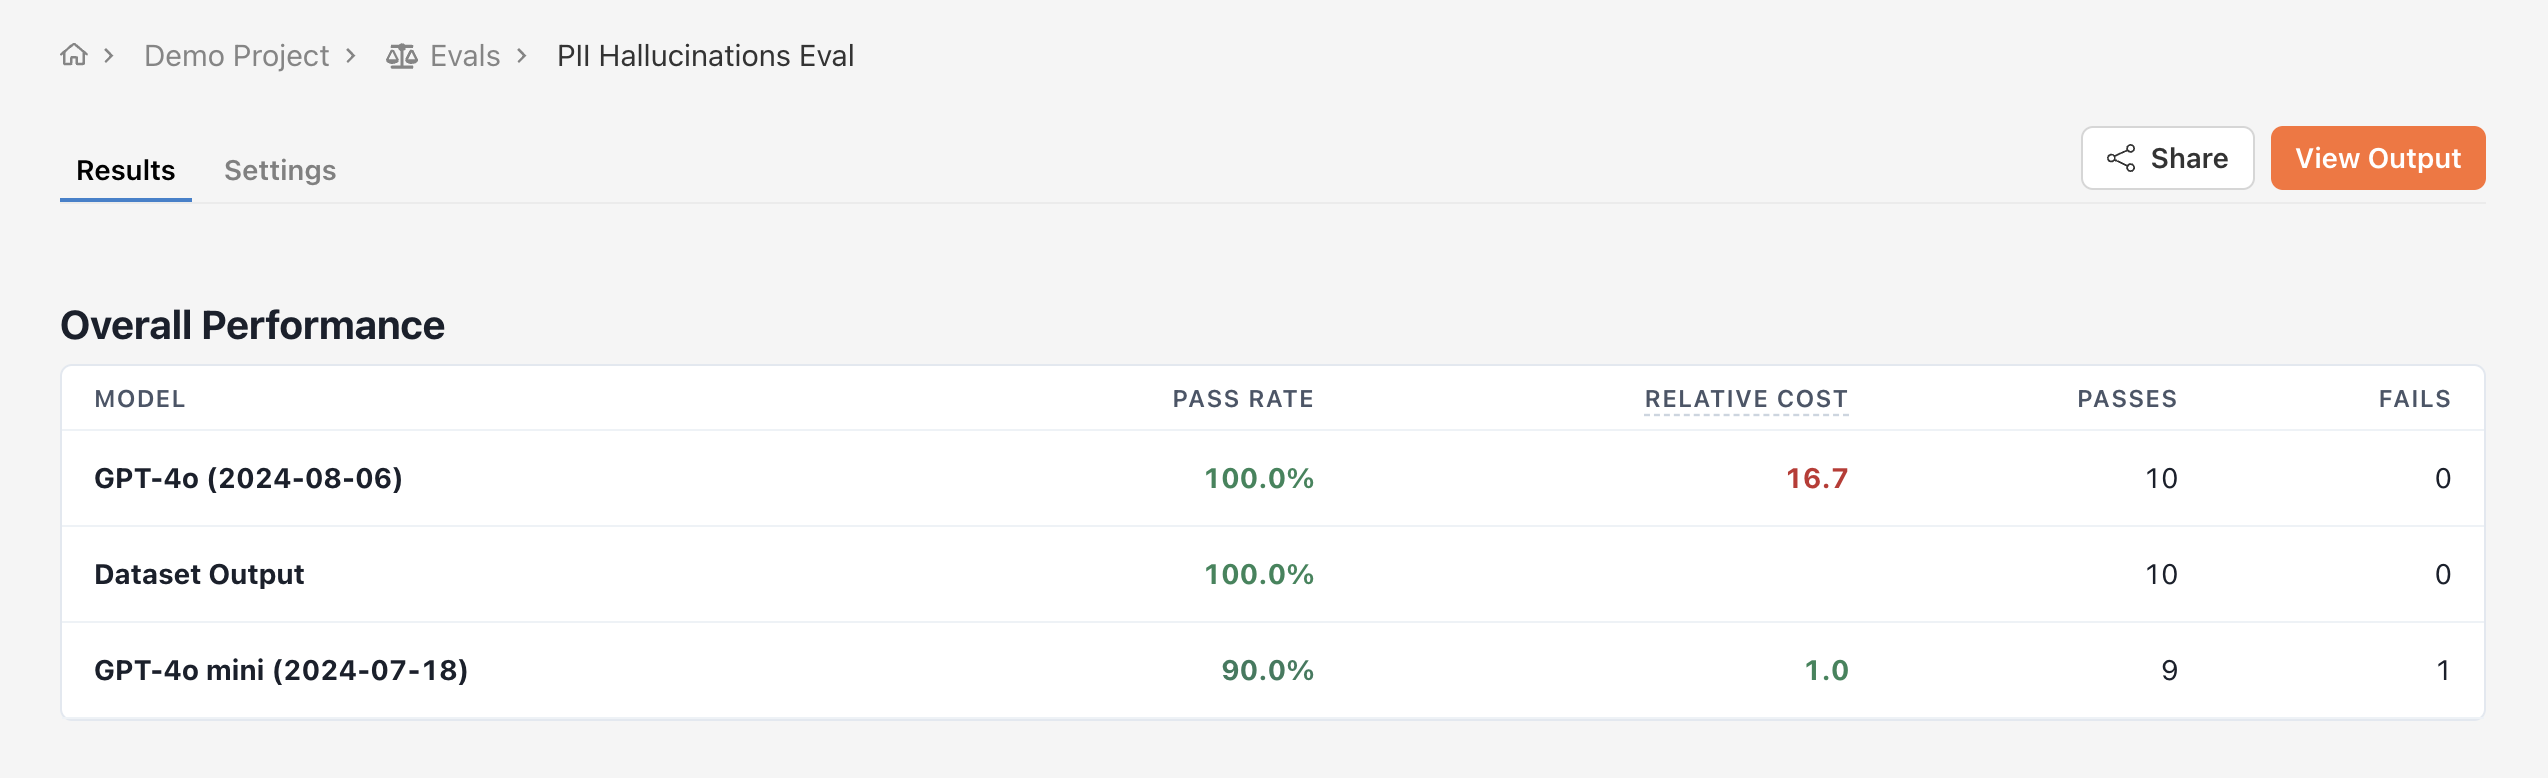
Deploying a Criterion
The simplest way to deploy a criterion is to create a criterion eval. Unlike head to head evals, criterion evals are not pairwise comparisons. Instead, they evaluate the quality of one or more models’ output according to a specific criterion. First, navigate to the Evals tab and click New Evaluation -> Add criterion eval. Pick the models to evaluate and the test dataset on which to evaluate them. Next, select the criterion you would like to judge your models against. The judge model and prompt you defined when creating the criterion will be used to judge individual outputs from your models.