Step 1: Create Your OpenPipe Account
If you don’t already have one, create an account with OpenPipe at https://app.openpipe.ai/. You can sign up with GitHub, so you don’t need to remember an extra password.Step 2: Find Your Project API Key
In order to capture your calls and fine-tune a model on them, we need an API key to authenticate you and determine which project to store your logs under.When you created your account, a project was automatically configured for you as well. Find its
API key at https://app.openpipe.ai/settings.
Step 3: Record Training Data (Optional)
If you don’t have any training data, you can record it by integrating the OpenPipe SDK or using the OpenPipe Proxy. If you already have a dataset, you can skip this step!Installing the SDK
Using the OpenPipe Proxy
Step 4: Prepare a Dataset
Datasets are the core of OpenPipe. They store your training data, and allow you to fine-tune and evaluate models on it. To learn more about datasets, check out the Datasets page. Datasets can be populated in two ways: If you already have a dataset, we recommend uploading it as a starting point. Otherwise, make sure you set up request logging in step 3!Step 5: Fine Tune a Model
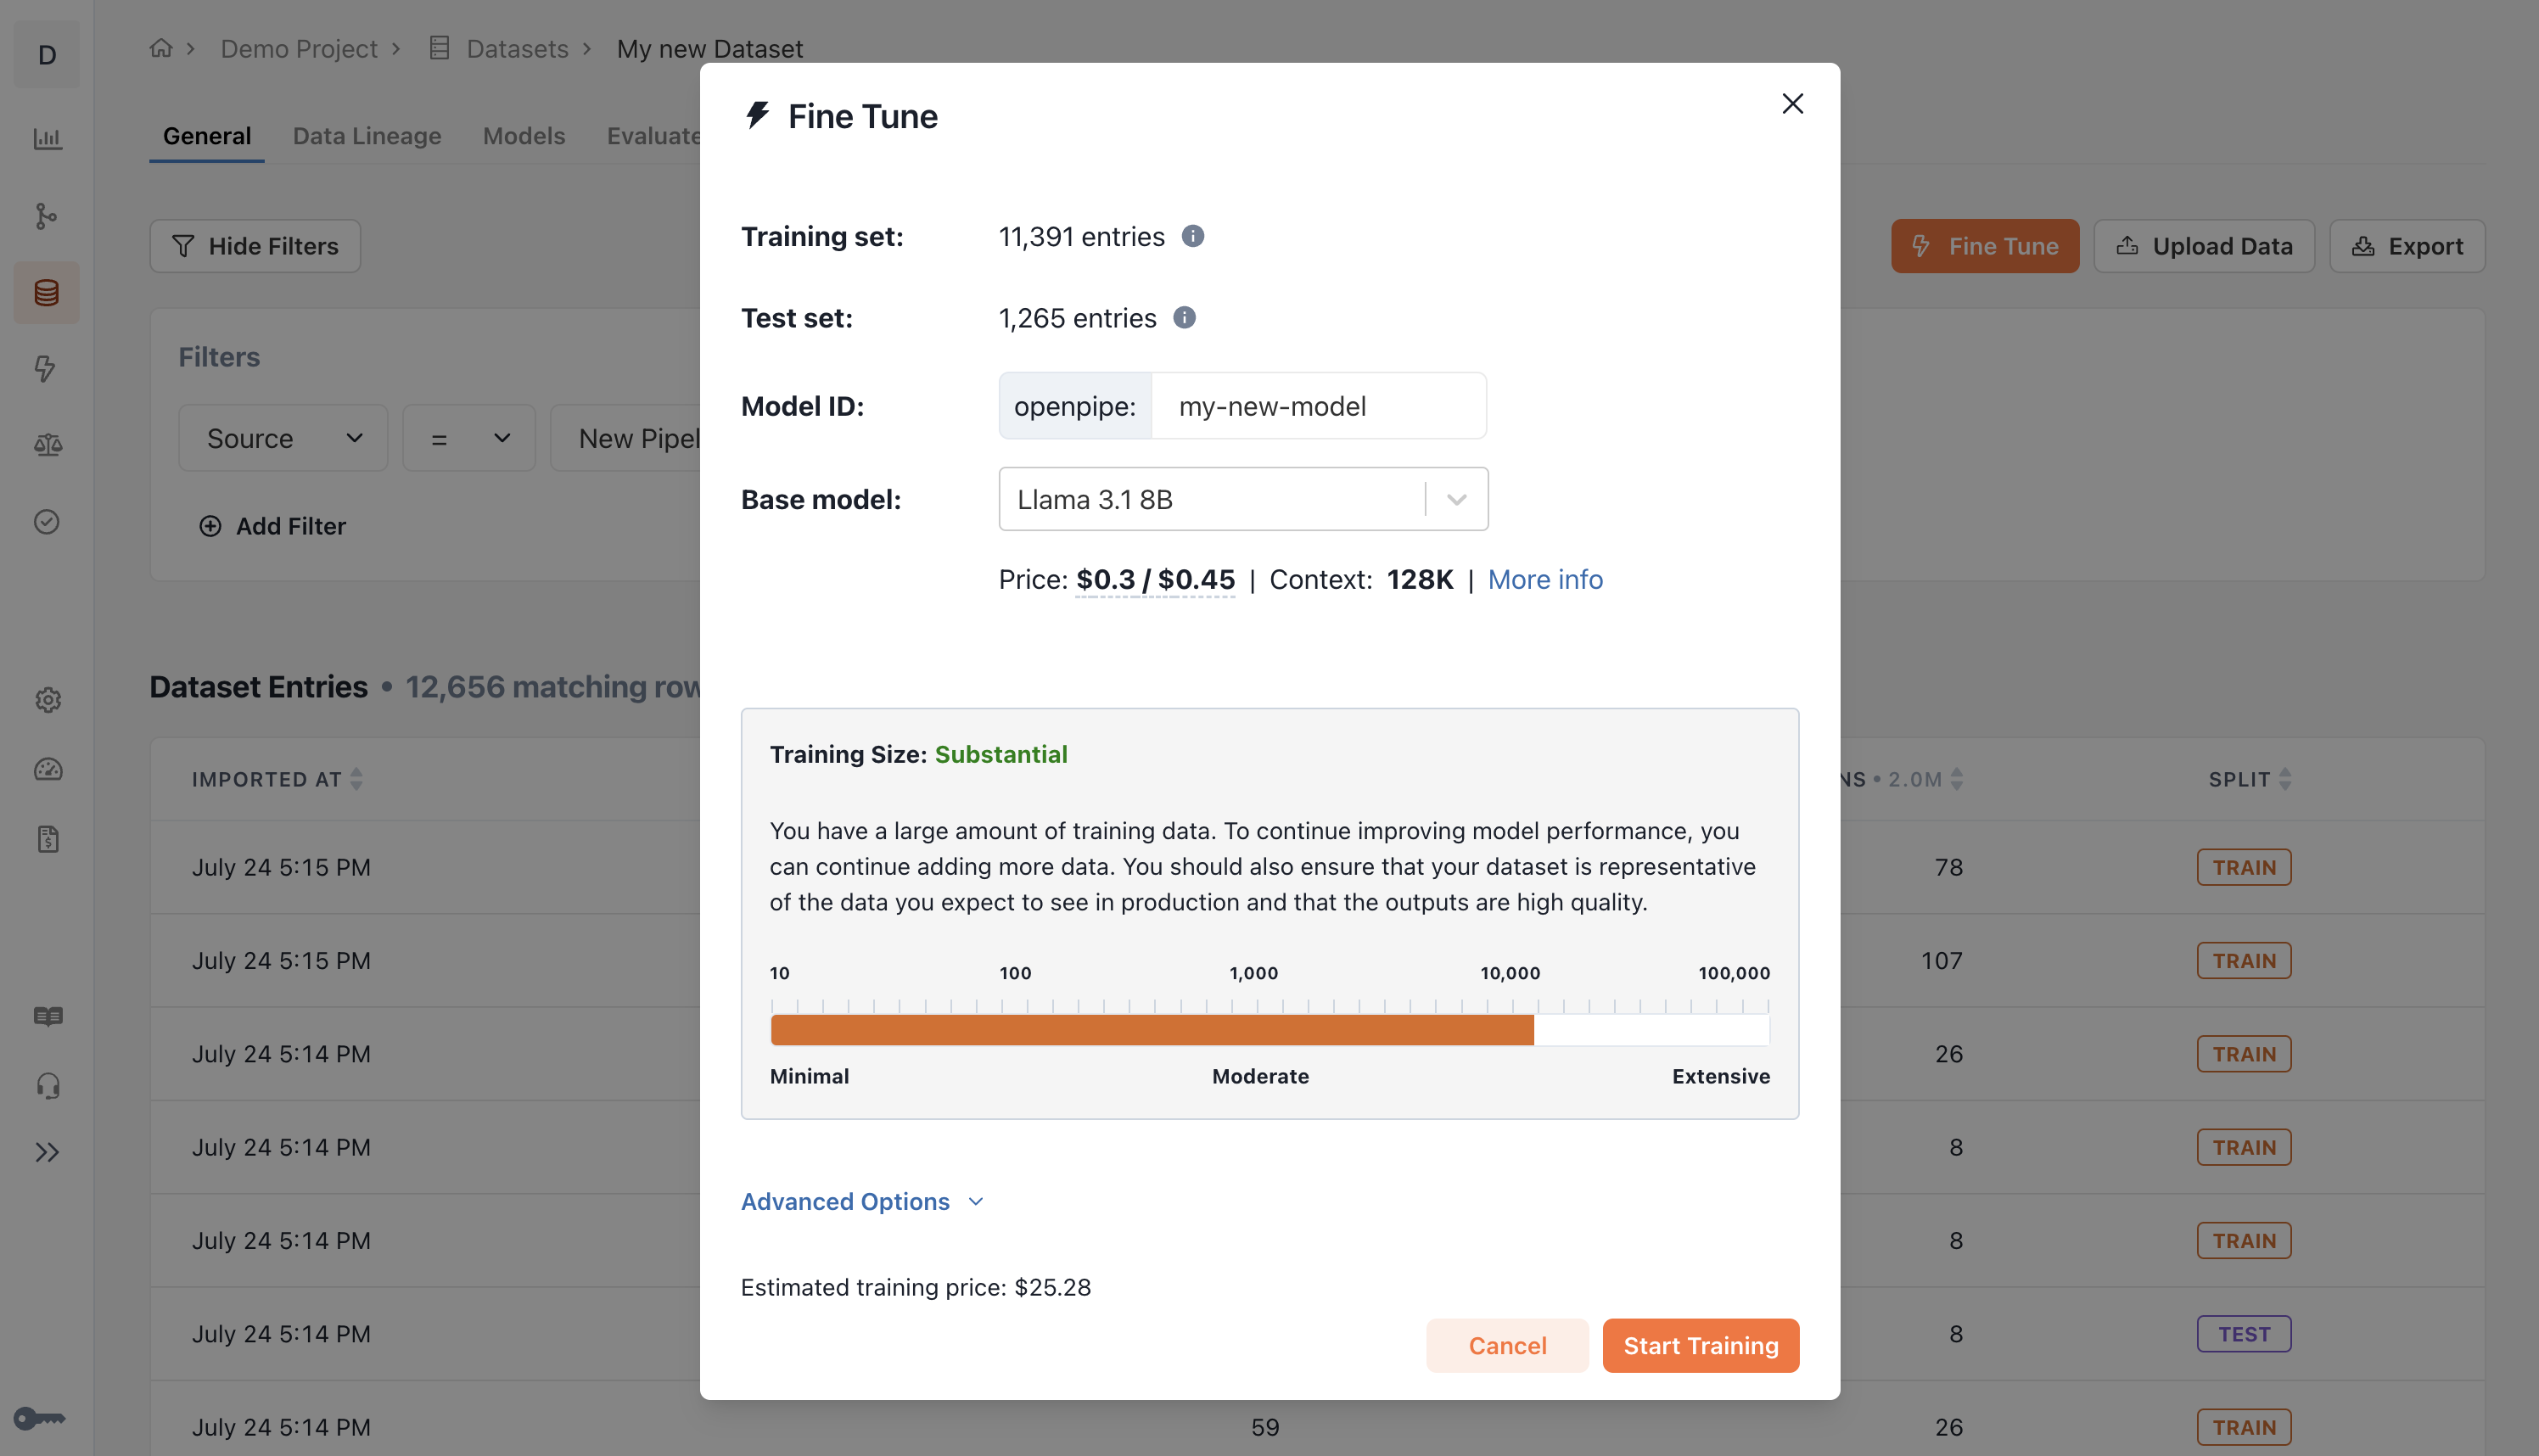
Once your dataset has been created and populated, you can fine-tune models on it. Follow the fine-tuning quickstart guide to kick off your first fine-tuning run.