> ## Documentation Index
> Fetch the complete documentation index at: https://docs.openpipe.ai/llms.txt
> Use this file to discover all available pages before exploring further.
# DPO Quick Start
> Train your first DPO fine-tuned model with OpenPipe.
DPO fine-tuning uses preference data to train models on positive and negative examples. In OpenPipe, DPO
can be used as a drop-in replacement for SFT fine-tuning or as a complement to it.
Before you begin: Before building training your first model with DPO, make sure you've
[created a dataset](/features/datasets/quick-start) and have collected at least 500 rows of
training data on OpenPipe or another platform.
To train a model with DPO, you need pairs of outputs containing preferred and rejected responses. You can prepare this data in one of two ways:
1. **Upload a JSONL file**
Add training rows to your dataset by [uploading a JSONL file](/features/datasets/uploading-data). Make sure to add a `rejected_message` field on each row that you'd like to use for preference tuning [(see docs)](/features/datasets/uploading-data#additional-fields).
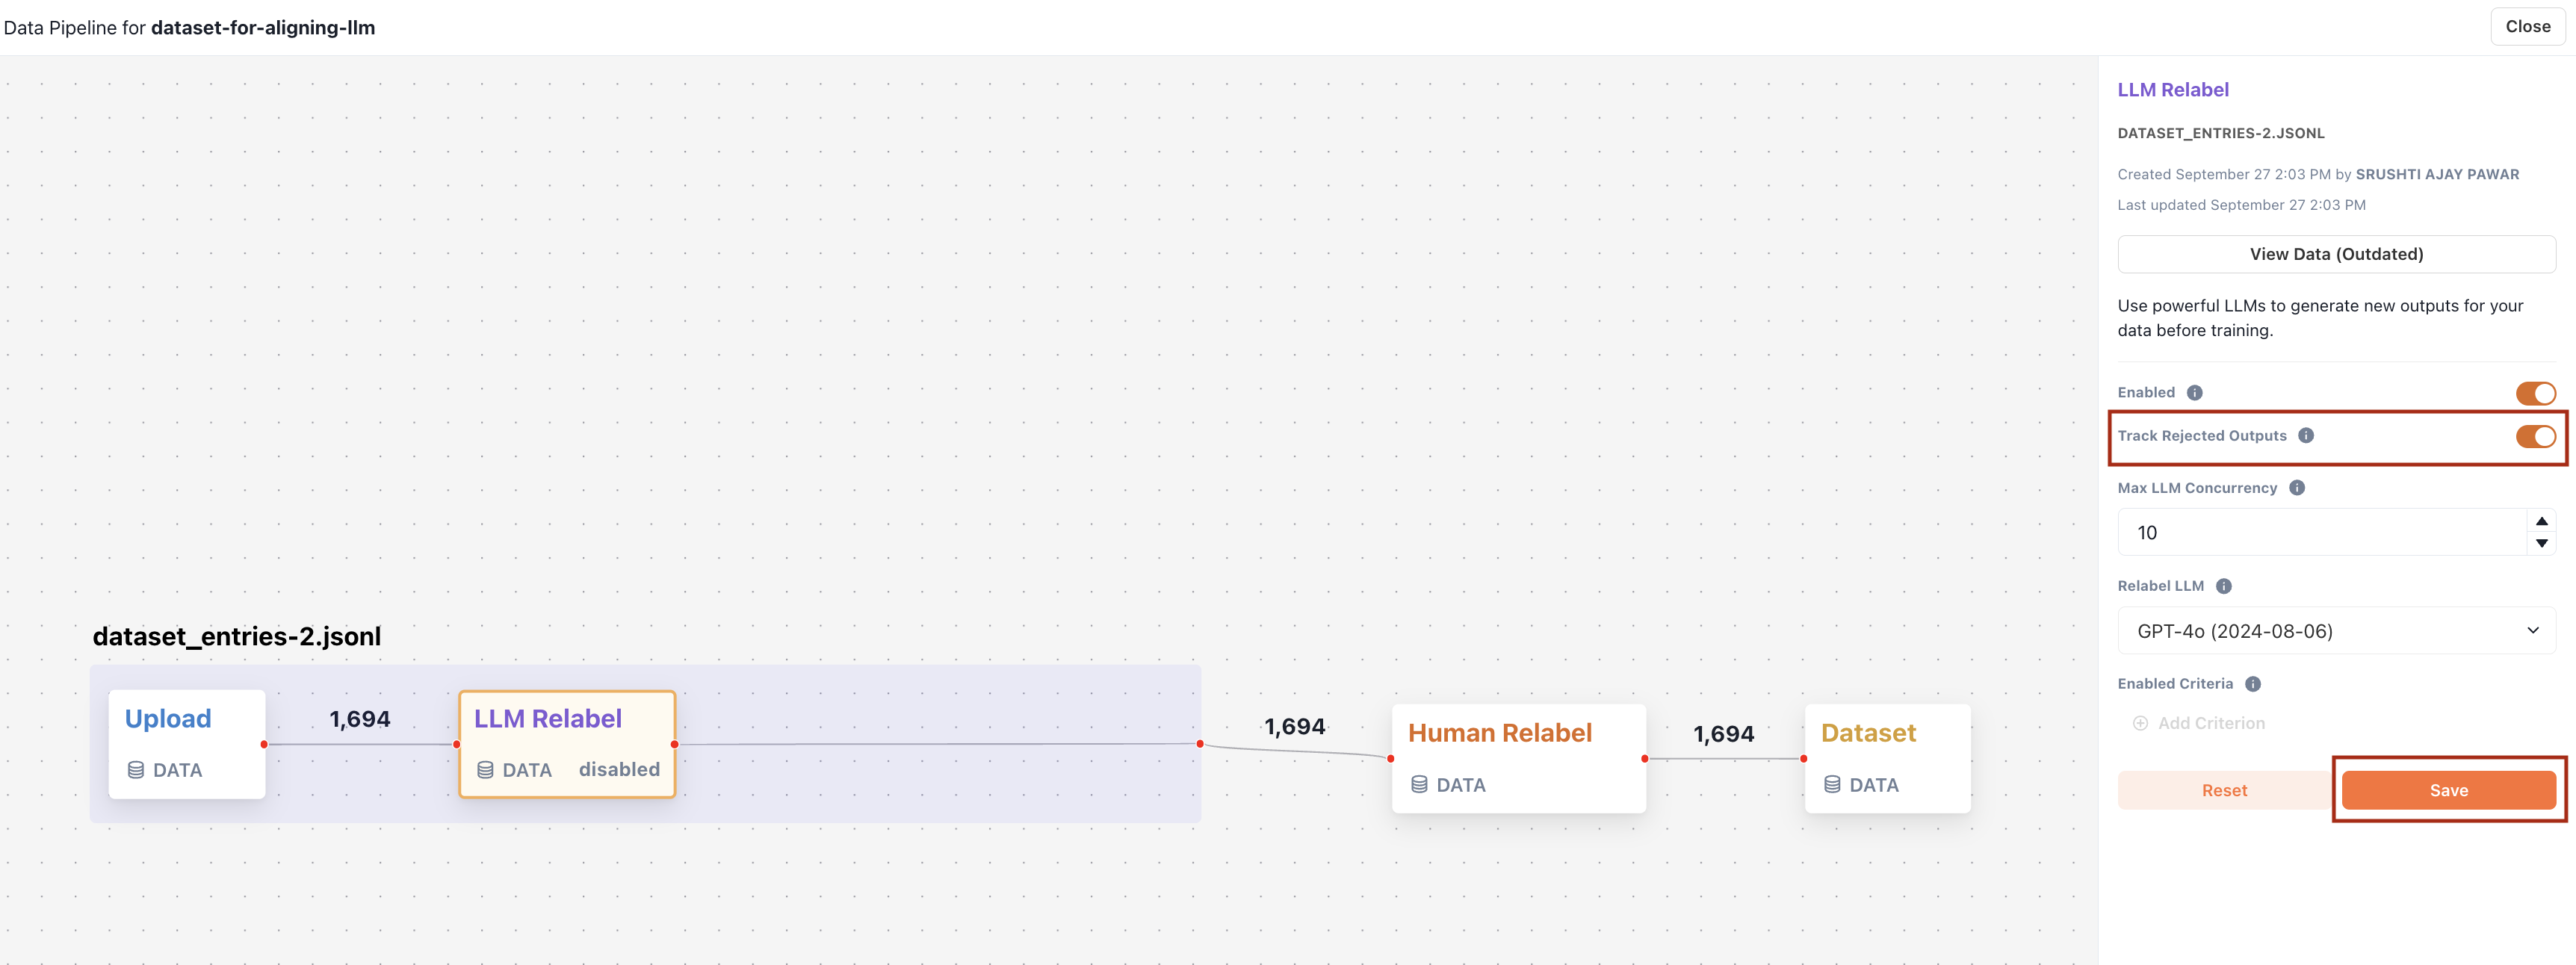
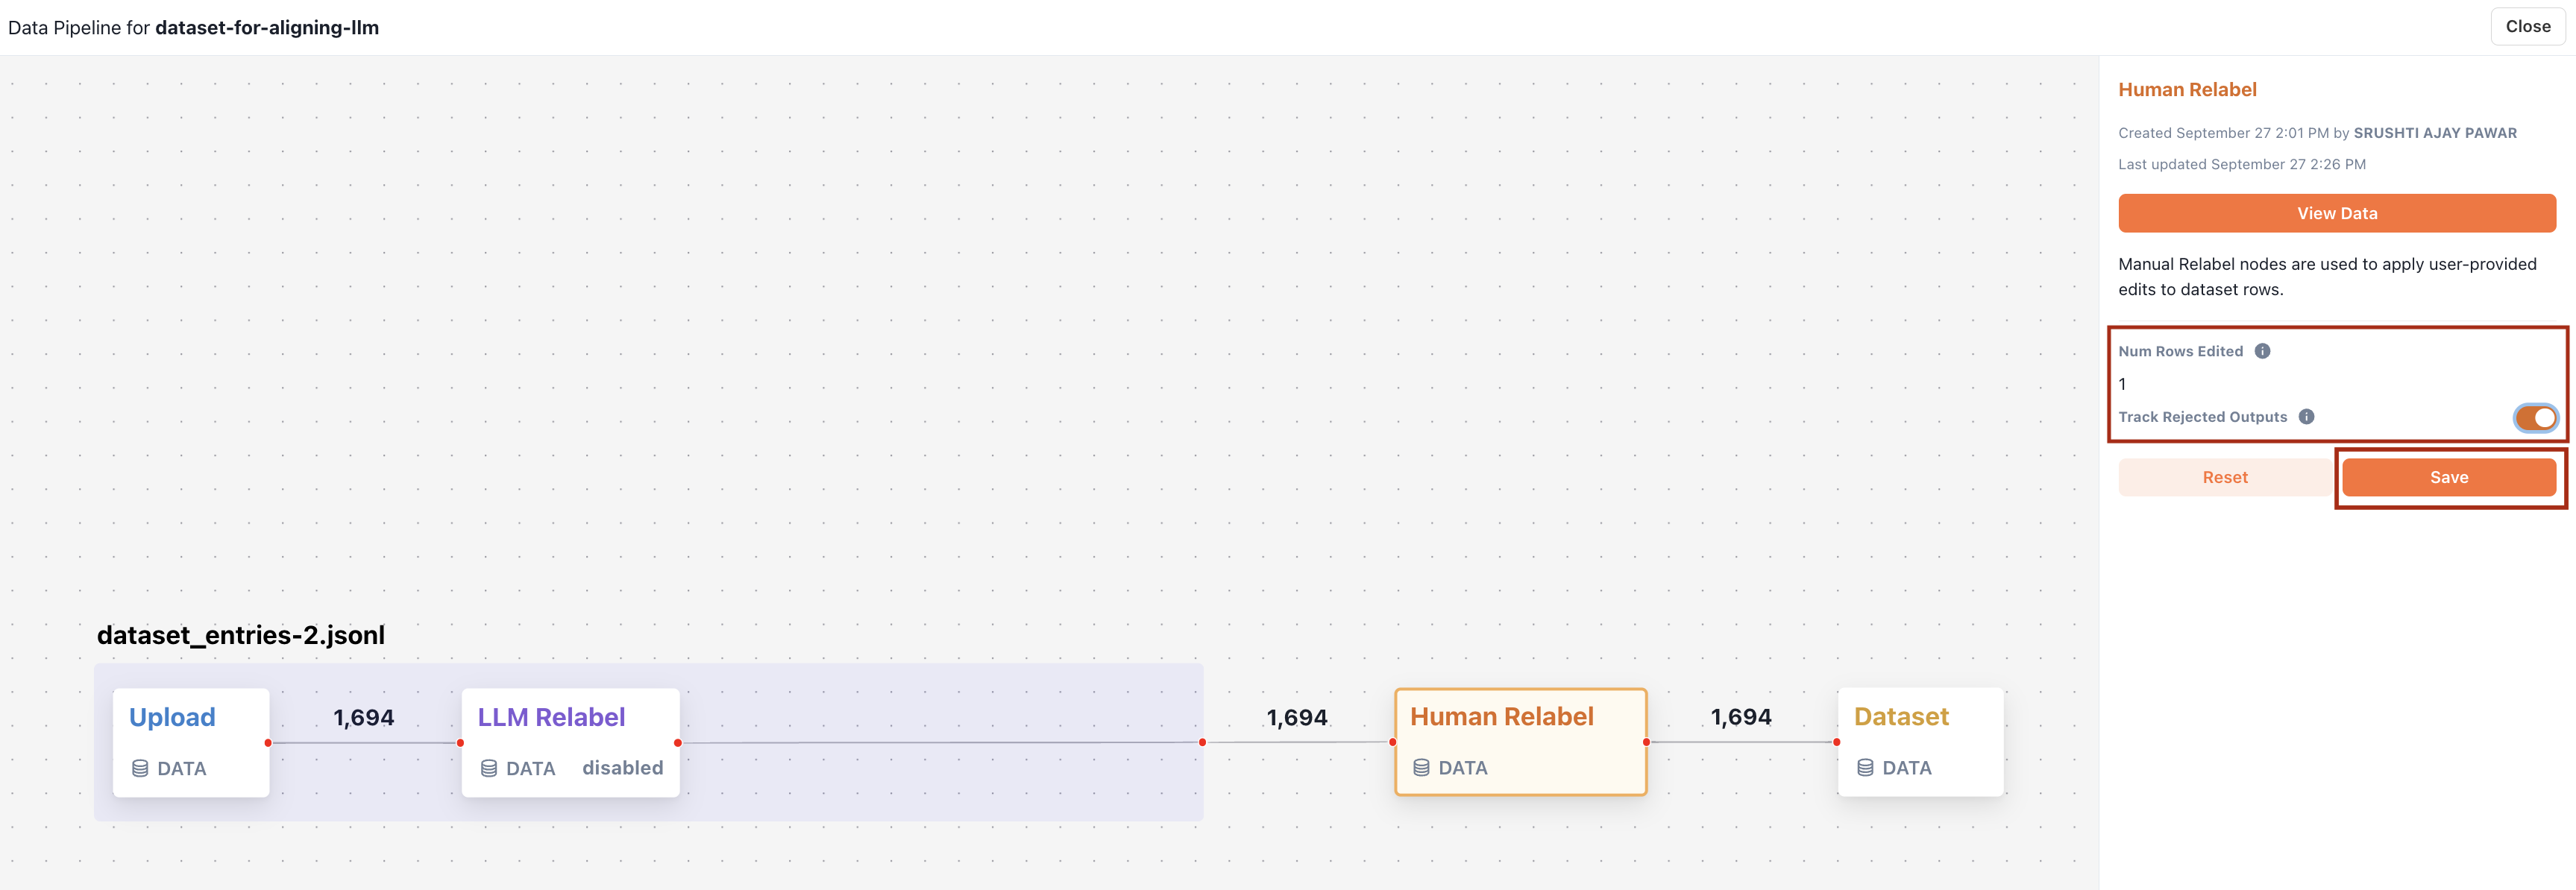
2. **Track Rejected Outputs**
In the **Data Pipeline** view of your dataset, you can convert original outputs that have been overwritten by either an LLM (through an LLM Relabel node) or human (through a Human Relabel node) into rejected outputs. The original output will be treated as the negative example, and the replacement output will be treated as the positive example.
LLM Relabel Node
Human Relabel Node
 Once your dataset is ready, training a DPO model is similar to training an SFT model.
1. Select the dataset you prepared for preference tuning.
2. Adjust the base model.
* Currently, DPO is only supported on Llama 3.1 8B.
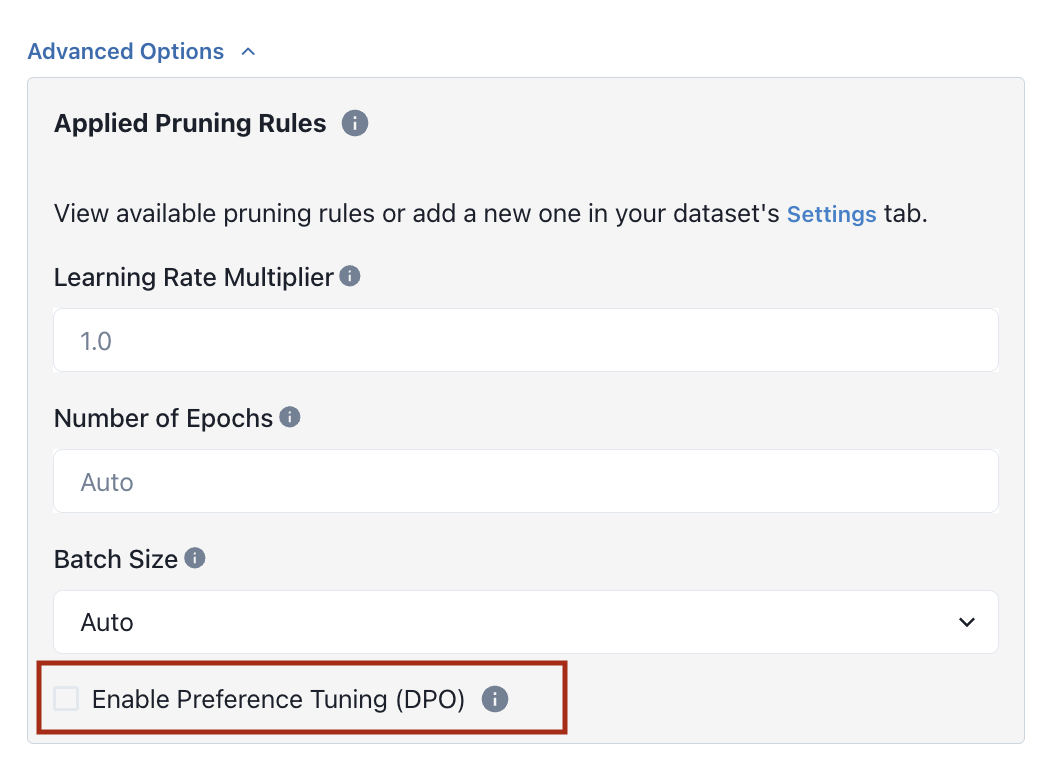
3. Under Advanced Options, click the Enable Preference Tuning checkbox.
Once your dataset is ready, training a DPO model is similar to training an SFT model.
1. Select the dataset you prepared for preference tuning.
2. Adjust the base model.
* Currently, DPO is only supported on Llama 3.1 8B.
3. Under Advanced Options, click the Enable Preference Tuning checkbox.
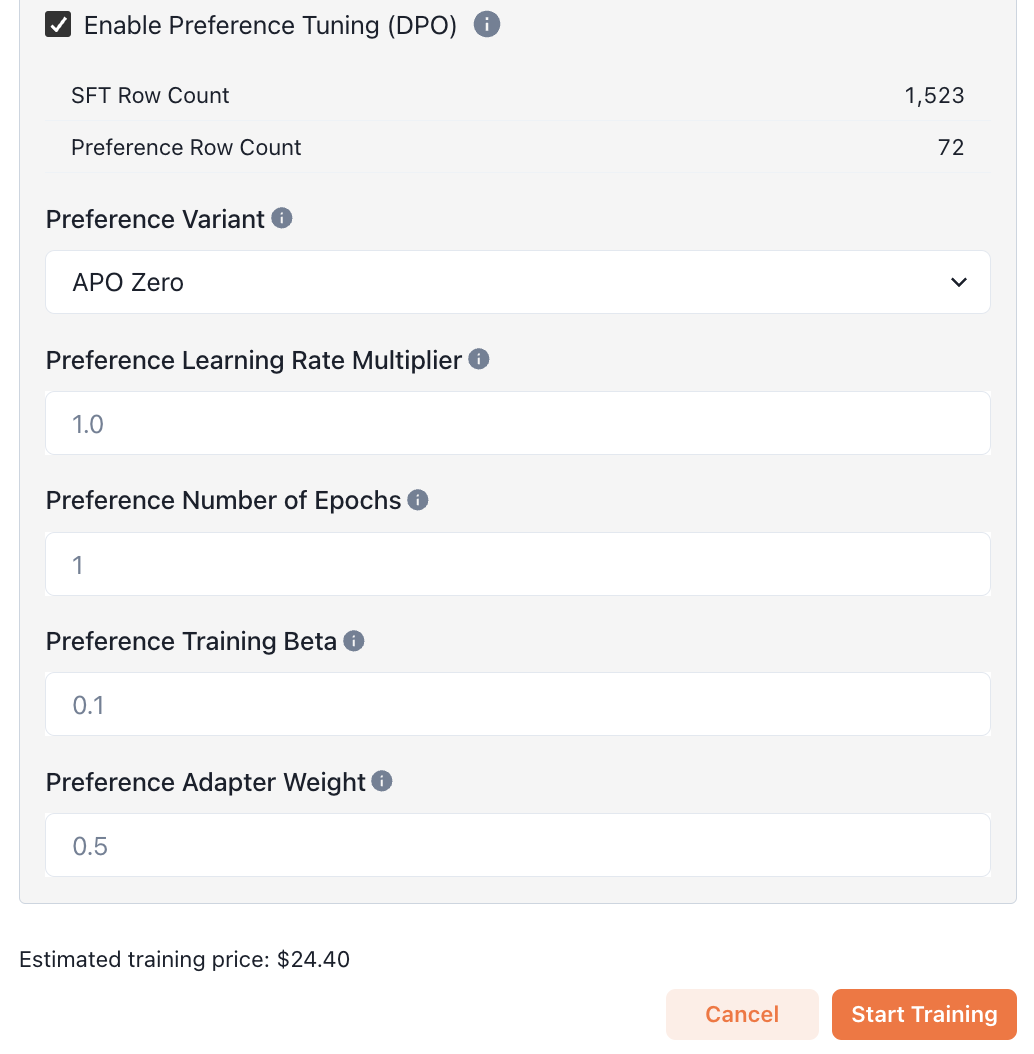
 You should now see the number of rows that will be used for supervised fine tuning
(SFT Row Count)
and preference tuning (Preference Row Count). Rows in your dataset that only include a
preferred output will be used for supervised fine tuning, while rows with both preferred and
rejected outputs will be used for preference tuning.
Adjust the training job's hyperparameters if needed. We recommend using the default values if you're unsure.
You should now see the number of rows that will be used for supervised fine tuning
(SFT Row Count)
and preference tuning (Preference Row Count). Rows in your dataset that only include a
preferred output will be used for supervised fine tuning, while rows with both preferred and
rejected outputs will be used for preference tuning.
Adjust the training job's hyperparameters if needed. We recommend using the default values if you're unsure.
 Finally, kick off a training job by clicking the **Start Training** button.